LAMP Stack (Linux, Apache, MySQL, PHP) on Oracle Cloud Always Free using Ubuntu 24.04 LTS.

Below is a start-to-finish, practical guide to install a LAMP Stack (Linux, Apache, MySQL, PHP) on Oracle Cloud Always Free using Ubuntu 24.04 LTS.
This is written so you can follow it without guessing—ideal for WordPress, blogs, PHP apps, or learning servers.


🚀 What You’ll Build

  • Oracle Cloud Always Free VM

  • Ubuntu 24.04 LTS

  • Apache 2

  • MySQL 8

  • PHP 8.3

  • Optional: phpMyAdmin

  • Firewall + security best practices


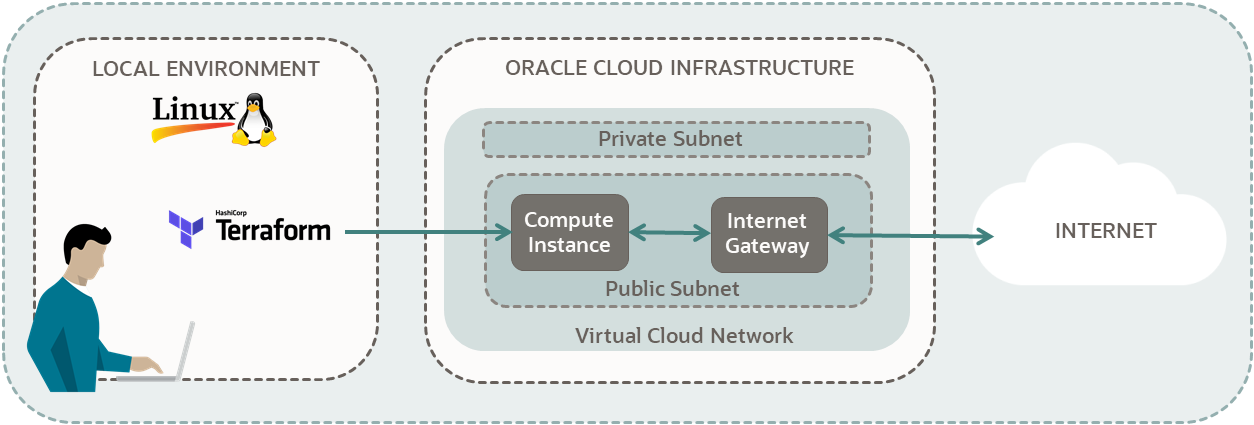
🧱 Architecture Overview

https://www.researchgate.net/publication/315111654/figure/fig6/AS%3A668883266576402%401536485606604/Architecture-of-a-LAMP-stack.png
https://www.researchgate.net/publication/7032895/figure/fig2/AS%3A287841717374976%401445638221395/System-architecture-The-system-used-the-PHP-504-Apache-1333-Win32-and-MySQL.png
https://imagitrue.com/wp-content/uploads/2019/08/bg.jpg

1️⃣ Create Oracle Cloud Always Free Instance

🔹 Sign up / Login

Go to Oracle Cloud Console


🔹 Create Compute Instance

Menu → Compute → Instances → Create instance

Recommended settings:

Setting Value
Image Ubuntu 24.04 LTS
Shape VM.Standard.E2.1.Micro (Always Free)
OCPU 1
RAM 1 GB
Boot Volume 50 GB (Free limit)
Networking Public IPv4 enabled
SSH Generate key pair (download .pem)

📌 Save the private key carefully

https://docs.oracle.com/en-us/iaas/Content/dev/terraform/images/terraform-compute-diagram.png
https://documentation.ubuntu.com/oracle/_images/1_latest_ubuntu_image.png
https://learncodeshare.net/wp-content/uploads/2019/12/DashboardCreateCompute.png

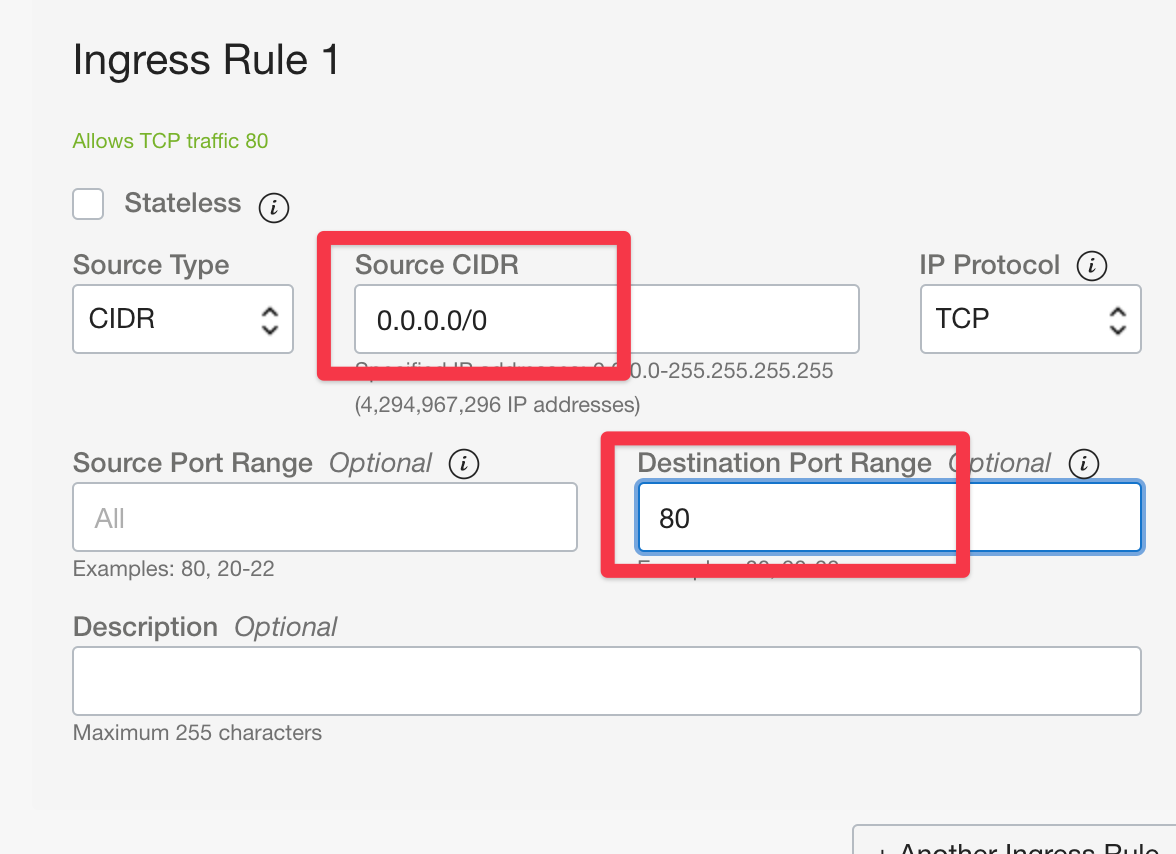
2️⃣ Open Required Ports (VERY IMPORTANT)

🔹 In Oracle Cloud Network

VCN → Subnet → Security List → Ingress Rules

Add:

Port Protocol Source
22 TCP 0.0.0.0/0
80 TCP 0.0.0.0/0
443 TCP 0.0.0.0/0
https://www.oracle.com/webfolder/technetwork/tutorials/obe/cloud/sscs/mftcs_oci_security_rules/img/edit_rules.png
https://cleavr.io/images/oracle/oracle-port-5.png

3️⃣ SSH Login to Server

🖥️ From Windows (PowerShell / CMD)

ssh -i yourkey.pem ubuntu@PUBLIC_IP

🖥️ From Linux / macOS

chmod 400 yourkey.pem
ssh -i yourkey.pem ubuntu@PUBLIC_IP

✅ You should see:

ubuntu@your-server:~$

4️⃣ Update System (MANDATORY)

sudo apt update && sudo apt upgrade -y
sudo reboot

Reconnect after reboot.


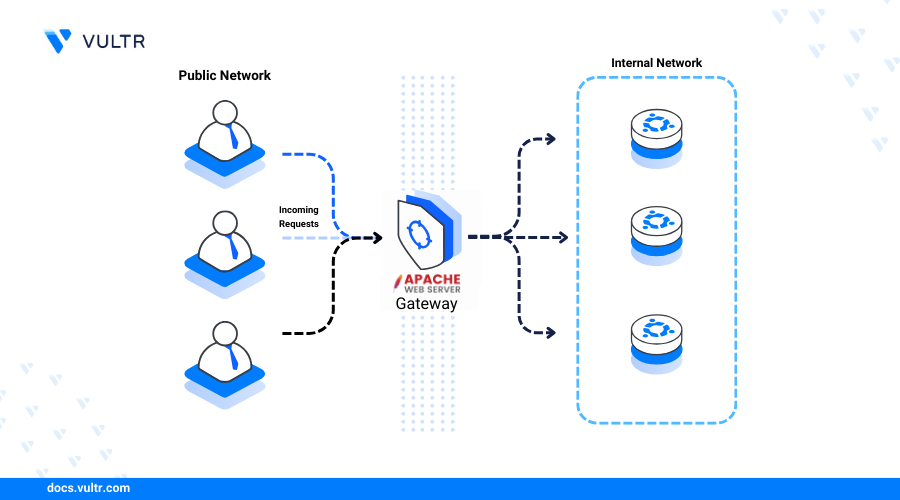
5️⃣ Install Apache Web Server

sudo apt install apache2 -y
sudo systemctl enable apache2
sudo systemctl start apache2

✅ Test Apache

Open browser:

http://PUBLIC_IP

You should see Apache Ubuntu Default Page

https://ubuntucommunity.s3.us-east-2.amazonaws.com/original/2X/7/771159b35c97e429247aac754ad44bf06cc1efa8.png
https://docs.vultr.com/public/doc-assets/1863/579fd0b59ee05446.png

✅ Fix: Install and Enable UFW (Recommended)

1️⃣ Install UFW

sudo apt update
sudo apt install ufw -y

2️⃣ Allow required services

sudo ufw allow OpenSSH
sudo ufw allow 'Apache Full'

(Optional explicit ports)

sudo ufw allow 80
sudo ufw allow 443 

sudo ufw allow OpenSSH
sudo ufw allow 'Apache Full'
sudo ufw allow 80
sudo ufw allow Apache
sudo ufw reload
sudo ufw enable 
sudo ufw status

3️⃣ Enable UFW

sudo ufw enable

Type y and press Enter

4️⃣ Verify status

sudo ufw status

You should see:

Status: active
80/tcp ALLOW
443/tcp ALLOW
22/tcp ALLOW

✅ Confirm Apache is Working

sudo systemctl status apache2

Then open in browser:

then

Update System (MANDATORY)

sudo apt update && sudo apt upgrade -y
sudo reboot
http://<YOUR_PUBLIC_IP>

You should see the Apache Ubuntu Default Page.

6️⃣ Enable Firewall (UFW)

sudo ufw allow OpenSSH
sudo ufw allow 'Apache Full'
sudo ufw enable
sudo ufw status

Expected output:

Apache Full ALLOW Anywhere
OpenSSH ALLOW Anywhere

7️⃣ Install MySQL Server

sudo apt install mysql-server -y
sudo systemctl enable mysql
sudo systemctl start mysql

🔐 Secure MySQL

sudo mysql_secure_installation

Recommended answers:

  • VALIDATE PASSWORD: No (Remove Password Extension)

  • Level: Medium

  • Root password: Strong

  • Remove anonymous users: Yes

  • Disallow remote root login: Yes

  • Remove test DB: Yes

  • Reload privileges: Yes


8️⃣ Create Database & User (Example)

sudo mysql
CREATE DATABASE appdb;
CREATE USER 'appuser'@'localhost' IDENTIFIED BY 'StrongPassword@123';
GRANT ALL PRIVILEGES ON appdb.* TO 'appuser'@'localhost';
FLUSH PRIVILEGES;
EXIT;

9️⃣ Install PHP 8.3 (Recommended for Ubuntu 24.04)

sudo apt install php php-mysql php-cli php-curl php-gd php-mbstring php-xml php-zip libapache2-mod-php -y

🔄 Restart Apache

sudo systemctl restart apache2

🔟 Test PHP Working

sudo nano /var/www/html/info.php

Paste:

<?php phpinfo(); ?>

Save → Open browser:
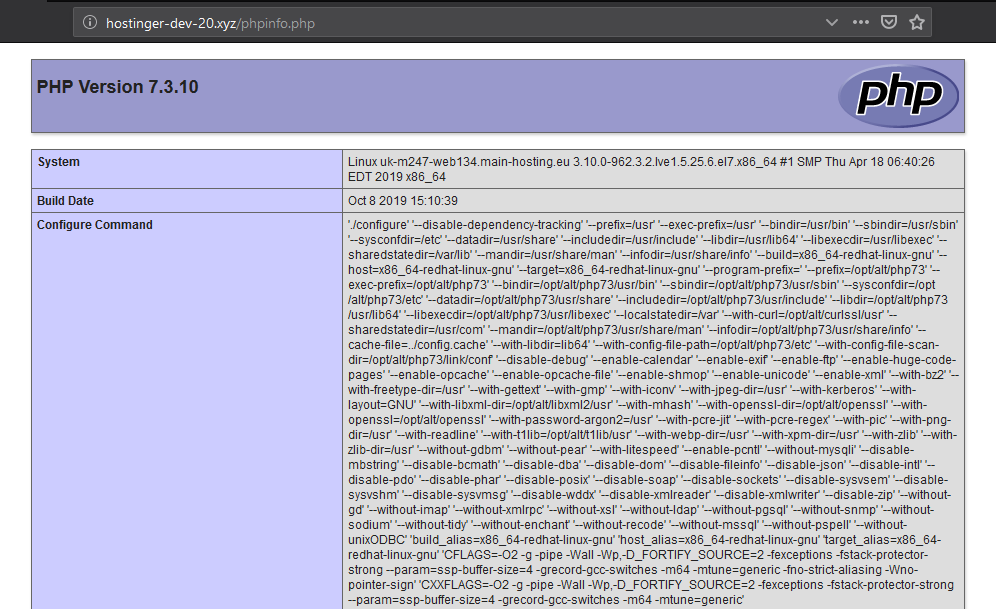
http://PUBLIC_IP/info.php
https://www.hostinger.com/tutorials/wp-content/uploads/sites/2/2017/03/PHP-information-on-a-browser.png
https://kinsta.com/wp-content/uploads/2019/10/phpinfo-page-example.png

✅ PHP is working

⚠️ Delete after testing

sudo rm /var/www/html/info.php

1️⃣1️⃣ Fix Permissions (IMPORTANT)

sudo chown -R www-data:www-data /var/www/html
sudo chmod -R 755 /var/www/html

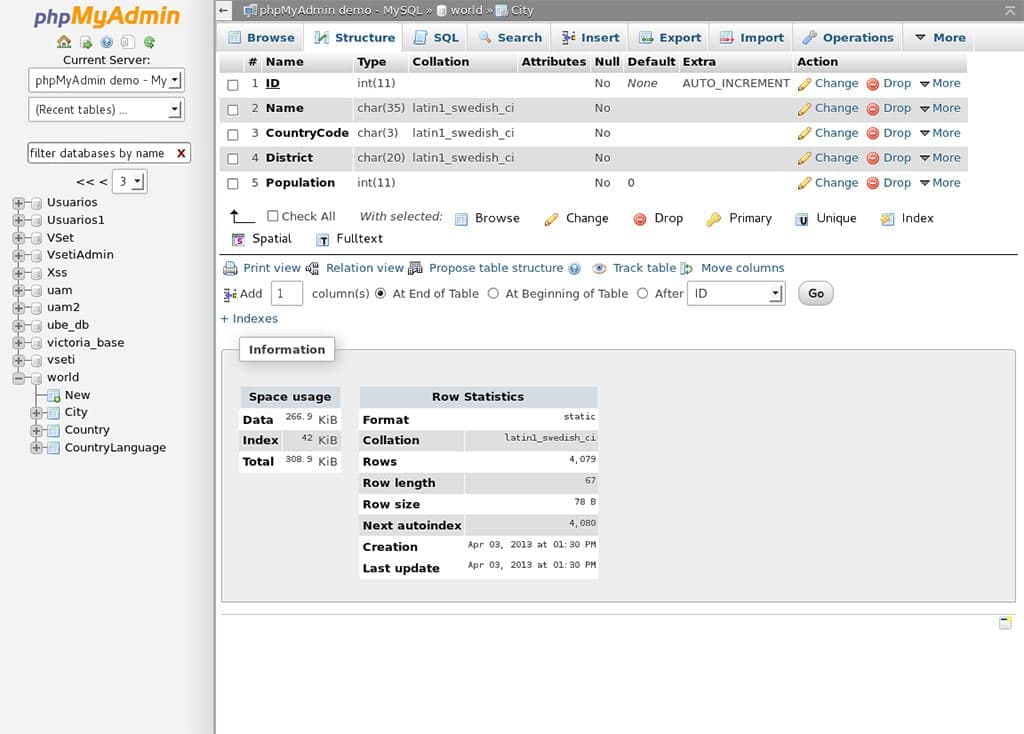
1️⃣2️⃣ Install phpMyAdmin (Optional)

sudo apt install phpmyadmin -y

Selections:

  • ✔ Apache2

  • ✔ Yes to dbconfig

  • Set phpMyAdmin password

Enable phpMyAdmin

sudo ln -s /usr/share/phpmyadmin /var/www/html/phpmyadmin
sudo systemctl restart apache2

Open:

http://PUBLIC_IP/phpmyadmin
https://www.awardspace.com/wp-content/uploads/2021/02/phpmyadmin-2.jpg
https://locallhost.me/assets/img/pages/phpmyadmin.jpg

1️⃣3️⃣ Enable Apache on Boot

sudo systemctl status apache2
sudo systemctl status mysql

Both should be active (running)


🔐 Security Best Practices (Recommended)

sudo apt install fail2ban -y
sudo systemctl enable fail2ban

Disable Apache version info:

sudo nano /etc/apache2/conf-available/security.conf

Set:

ServerTokens Prod
ServerSignature Off

Restart Apache:

sudo systemctl restart apache2

📌 Final Checklist

Component Status
Ubuntu 24.04
Apache
MySQL
PHP 8.3
Firewall
Always Free


1️⃣ Check who you are logged in as

whoami

Usually it is:

ubuntu

2️⃣ Fix ownership (Apache uses www-data)

Run exactly this:

sudo chown -R www-data:www-data /var/www/html

3️⃣ Fix directory & file permissions

sudo find /var/www/html -type d -exec chmod 755 {} \;
sudo find /var/www/html -type f -exec chmod 644 {} \;

4️⃣ Now edit the file using sudo

sudo nano /var/www/html/index.html

This WILL open without “permission denied”

Save with:

CTRL + O → Enter → CTRL + X

🔁 Alternative (If you want ubuntu user to edit without sudo)

⚠️ Use this only for personal servers

sudo chown -R ubuntu:www-data /var/www/html
sudo chmod -R 775 /var/www/html

Now you can edit without sudo:

nano /var/www/html/index.html

❌ What NOT to Do

❌ Do NOT use:

chmod 777 /var/www/html

This is unsafe and insecure.


🧪 Verify Fix

ls -ld /var/www/html

Expected output:

drwxr-xr-x www-data www-data /var/www/html

or

drwxrwxr-x ubuntu www-data /var/www/html

🔍 If Error Still Comes

Run and paste output:

ls -l /var/www/html/index.html

I’ll tell you exactly what to fix next.


✅ Summary

✔ Error reason: ownership mismatch
✔ Correct fix: chown + chmod
✔ Safe for Apache + Ubuntu
✔ Works on Oracle Cloud Always Free

🔴 Why FileZilla Shows “Permission Denied”

  • You connect as user: ubuntu

  • Folder owner: www-data

  • FileZilla cannot use sudo

  • Result ❌ upload / edit fails


✅ FIX 1 (BEST & SAFE) – Give ubuntu user access

🔹 Run these commands once in SSH

sudo chown -R ubuntu:www-data /var/www/html
sudo chmod -R 775 /var/www/html

🔹 Verify

ls -ld /var/www/html

Expected:

drwxrwxr-x ubuntu www-data /var/www/html

✅ Now FileZilla WILL work


🔐 FIX 2 – Add ubuntu user to www-data group (Recommended)

sudo usermod -aG www-data ubuntu

⚠️ Logout & login again

exit

Reconnect SSH, then:

groups

You should see:

ubuntu www-data

📁 FileZilla Correct Settings (IMPORTANT)

https://www.ionos.com/help/fileadmin/images/hosting/ftp/2938/EN/2938_EN_transfer_files_filezilla_linux_03.png
https://filezillapro.com/wp-content/uploads/2019/11/screenshot_sitemanager_newsite.png
https://bobcares.com/wp-content/uploads/ftp-permission-denied.png

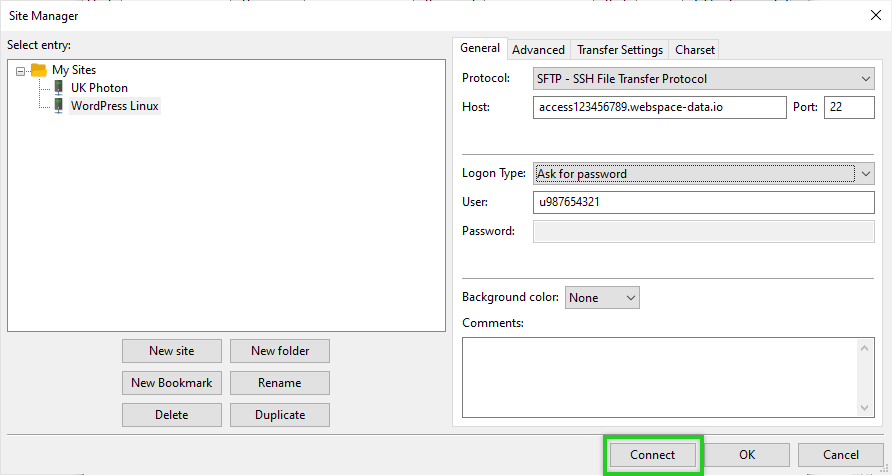
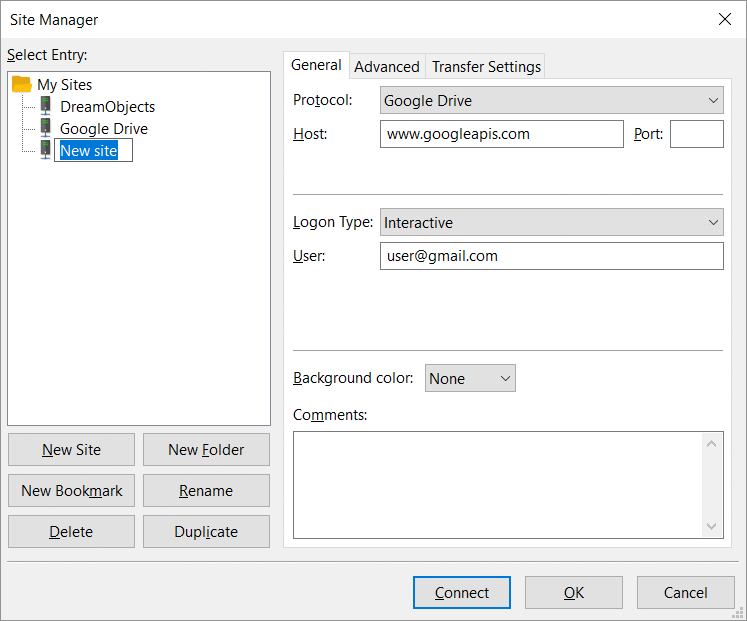
🔹 Site Manager Settings

Setting Value
Protocol SFTP
Host PUBLIC_IP
Username ubuntu
Port 22
Logon Type Key file
Key file your .pem key

📌 If .pem not accepted → FileZilla will auto-convert to .ppk


🧪 Test in FileZilla

Try uploading a file to:

/var/www/html/

✅ It should upload without error


❌ DO NOT DO THIS

chmod 777 /var/www/html

❌ Security risk
❌ Anyone can write files


🧰 If Still Permission Denied (Rare Case)

Run:

sudo setfacl -R -m u:ubuntu:rwx /var/www/html
sudo setfacl -R -d -m u:ubuntu:rwx /var/www/html

✅ Final Checklist

✔ Ownership fixed
✔ Group access enabled
✔ FileZilla SFTP correct
✔ Apache still secure

Leave a Comment

Your email address will not be published. Required fields are marked *

Scroll to Top